How to Set Up a Travel Router: Step-by-Step Guide for Beginners
Complete beginner's guide to setting up a travel router. Step-by-step instructions using the GL.iNet Beryl AX with VPN, eSIM tethering, and WiFi repeating.
Hotel WiFi in Bangkok: 3 Mbps, shared with 200 guests, and zero encryption. The login portal requires re-authentication every hour. Your laptop, phone, tablet, and partner’s devices all need separate logins. And your VPN app keeps disconnecting because the network resets your connection every 45 minutes.
Now the same hotel room with a travel router: you log into the hotel portal once on the router. It creates a private WiFi network with a VPN running on everything. All your devices connect to your own network name and password — the same one you use in every country. No portal re-logins, no individual VPN apps, no exposed traffic. Setup took 10 minutes on your first trip, and now you just plug it in.
A travel router is the single most impactful piece of travel tech we carry, and it costs less than a nice dinner. This guide walks you through setting one up from zero — no networking knowledge required.
What Is a Travel Router?
A travel router is a compact, portable device that creates a private WiFi network from an existing internet source. It is not a mobile hotspot — it does not connect to cell towers on its own. Instead, it takes internet from somewhere else and makes it better:
- Hotel/cafe WiFi: The router connects to the public WiFi and rebroadcasts it as your own private, encrypted network
- Phone tethering: Connect your phone via USB, and the router shares your phone’s cellular data with all your devices
- Ethernet: Plug in a wired connection (common in offices, some hotels) and create a wireless network from it
Think of it as a translator between the internet source and your devices, adding security and convenience in the process.
Why Every Traveler Should Consider One
Pros
- Secure every device with a single VPN connection at the router level
- Same WiFi name and password in every hotel, Airbnb, and cafe worldwide
- Extend weak WiFi signals — the router has a stronger radio than your phone
- Share one internet source (phone eSIM, hotel WiFi) with 10+ devices
- Protect devices that cannot run VPN apps (e-readers, IoT, smart watches)
- Eliminate captive portal re-logins — authenticate once on the router
- Pocket-sized (most weigh under 200g) and USB-C powered
Cons
- Another device to carry and keep charged (USB-C powered, no internal battery on most models)
- Requires an internet source — it cannot create internet from nothing
- Initial setup takes 10-15 minutes (but only once)
- Some hotel captive portals require workarounds on the router
- VPN adds 5-15% speed overhead (minimal with WireGuard)
What You Need Before Starting
Before you begin setup, gather these items:
1. A Travel Router
We use the GL.iNet Beryl AX (GL-MT3000) throughout this tutorial. It is our top recommendation for most travelers: WiFi 6 support, built-in VPN client (WireGuard and OpenVPN), USB tethering, and a compact form factor for about $90.
Get the GL.iNet Beryl AX on Amazon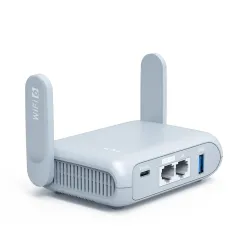
Other good options include the GL.iNet Slate AX ($65, budget pick) and the GL.iNet Flint 2 ($120, more range). All GL.iNet routers use the same admin interface, so this tutorial applies to all of them. For our full router comparison, see best travel routers.
2. A USB-C Cable and Power Source
The Beryl AX powers from USB-C. You can use:
- A USB wall charger (5V/2A minimum, which is any modern phone charger)
- A laptop’s USB-C port
- A portable power bank (for on-the-go use)
The router draws about 8-10 watts — less than charging a phone.
3. An Internet Source
The router needs one of these to work:
- Hotel/cafe WiFi — the router joins it like any other device
- Phone with cellular data — connect via USB for tethering
- Ethernet cable — plug directly into the router’s WAN port
4. A VPN Subscription (Recommended)
A VPN running on the router encrypts all traffic from all devices. We recommend:
- NordVPN — fastest speeds, 6,400+ servers, excellent WireGuard support
- Surfshark — unlimited devices, great value, strong WireGuard performance
Both provide downloadable WireGuard configuration files that work directly on GL.iNet routers.
5. A Travel eSIM (If Tethering from Phone)
If your primary internet source will be your phone’s cellular data, grab an eSIM before your trip:
Saily offers plans starting at $3.99 for 150+ countries. Saily explicitly allows tethering on all plans without throttling — important because some eSIM providers restrict hotspot use.
Step-by-Step Setup: GL.iNet Beryl AX
Follow these steps in order. The entire process takes 10-15 minutes on your first setup. After that, the router remembers everything — you just plug it in and it works.
Step 1: Unbox and Power On
- Remove the router from its box. You will find the router, a USB-C cable, and a quick start guide.
- Connect the USB-C cable to the router and plug the other end into a USB power source (wall charger, laptop, or power bank).
- Wait 30-60 seconds for the router to boot. The power LED will turn solid blue when ready.
The router is now broadcasting its default WiFi network. You have not configured anything yet — it is just powered on and waiting for setup.
Step 2: Connect to the Router’s Default WiFi
- On your laptop or phone, open WiFi settings.
- Look for a network named GL-MT3000-xxx (the last three characters are unique to your router).
- Connect to it. The default password is goodlife (printed on the bottom of the router).
You are now connected to the router’s WiFi. There is no internet yet — the router is not connected to any upstream source. That comes next.
Step 3: Open the Admin Panel
- Open a web browser (Chrome, Safari, Firefox — any browser works).
- Navigate to 192.168.8.1 in the address bar.
- You will see the GL.iNet admin panel. On first access, it asks you to set a new admin password.
- Set a strong admin password. This is different from the WiFi password. Write it down or save it in your password manager. You will need it to access the admin panel in the future.
- Select your preferred language and time zone, then click “Submit.”
You are now in the router’s admin panel — a clean, visual dashboard where you configure everything.
Step 4: Set Your WiFi Network Name and Password
This is the WiFi name and password your devices will use everywhere. Choose something memorable — you will use it in every hotel, cafe, and Airbnb for the foreseeable future.
- In the admin panel, go to Wireless in the left sidebar.
- Under the 2.4 GHz section, change the network name (SSID) to something you will recognize (e.g., “MyTravelWiFi”).
- Set a strong WiFi password (at least 12 characters).
- Repeat for the 5 GHz section. Use the same name and password — your devices will automatically connect to whichever band is stronger.
- Click Apply.
Your router now broadcasts your custom WiFi network. Disconnect from the old “GL-MT3000-xxx” network and reconnect using your new network name and password.
Pro tip: We use the same WiFi name and password on every trip. Our laptop, phone, tablet, and e-reader are all saved to this network. When we power on the router in a new country, every device automatically connects. Zero configuration at each new location.
Step 5: Connect the Router to the Internet
Now you need to give the router an internet source. Choose one of these three methods:
Method A: Hotel/Cafe WiFi (Repeater Mode)
- In the admin panel, go to Internet in the left sidebar.
- Click Repeater (the middle option, shows a WiFi icon).
- The router scans for available networks. Select the hotel or cafe WiFi.
- Enter the WiFi password and click Join.
- If the network has a captive portal (a login page), you will need to open a browser and complete the login. The admin panel will prompt you if this is needed.
The router is now connected to the hotel WiFi and sharing it through your private network. All your devices connect to your router — not directly to the hotel WiFi. Your traffic is isolated.
Method B: Phone USB Tethering
- Connect your phone to the router using a USB cable (Lightning-to-USB-A for older iPhones, USB-C for newer phones and Android).
- On your phone, enable USB tethering:
- iPhone: Go to Settings > Personal Hotspot > enable “Allow Others to Join” (the USB connection is detected automatically when you plug in the cable).
- Android: Go to Settings > Network & Internet > Hotspot & tethering > enable “USB tethering.”
- In the router admin panel, go to Internet and click Tethering (shows a USB icon).
- The router detects your phone and connects automatically. You should see a “Connected” status within 10 seconds.
Your phone’s cellular data is now shared through the router. All devices connect to the router’s WiFi. Your phone charges through the USB connection simultaneously.
This is our preferred method. Install a travel eSIM on your phone (like Saily ), connect via USB, and you have a full WiFi network powered by your phone’s cellular data. Simple, reliable, and your phone stays charged.
Method C: Ethernet (Wired Connection)
- Plug an ethernet cable into the router’s WAN port (the blue port on the Beryl AX).
- The router detects the wired connection and connects automatically.
- No additional configuration needed.
This is the fastest and most reliable method but requires a physical ethernet port at your location. Some hotels have ethernet in the room, and coworking spaces often offer wired connections.
Step 6: Verify Your Connection
- Connect a device (laptop or phone) to your router’s WiFi network.
- Open a browser and visit any website — if it loads, you are online.
- Run a speed test at speedtest.net to check your baseline speed.
- Note this speed — you will compare it against VPN speeds in the next step.
If the connection is not working, see the Troubleshooting section below.
Setting Up VPN on Your Travel Router
A VPN on the router encrypts all traffic from all connected devices. This is the most important configuration step for security-conscious travelers. We walk through both NordVPN and Surfshark setup.
Which VPN Protocol to Use: WireGuard vs OpenVPN
GL.iNet routers support both WireGuard and OpenVPN. Here is the difference:
| Feature | WireGuard | OpenVPN |
|---|---|---|
| Speed Overhead | 5-10% loss | 15-30% loss |
| Connection Time | Under 1 second | 5-10 seconds |
| Battery Impact | Low | Higher |
| Code Complexity | ~4,000 lines | ~100,000 lines |
| Security | Modern cryptography | Proven, battle-tested |
| Firewall Bypass | Moderate | Better (port 443) |
| Best For | Most travelers (recommended) | Censored countries (China, Iran) |
Our recommendation: Use WireGuard. It is faster, lighter, and connects instantly. Only switch to OpenVPN if WireGuard is blocked in your location (uncommon, but possible in China or Iran).
Setting Up NordVPN on Your Travel Router
NordVPN is the VPN we use daily on our travel router. It delivers the fastest speeds we have measured — typically only 5-8% overhead with WireGuard (NordLynx). Here is how to set it up:
Download NordVPN WireGuard Configuration
- Log into your NordVPN account at my.nordaccount.com.
- Navigate to NordVPN > Manual Setup > Router Setup.
- Under WireGuard, select the server you want to connect to (we recommend choosing a server near your physical location for speed, or your home country for accessing home services).
- Click Download Configuration. You will get a
.conffile.
Upload to Your Router
- In the GL.iNet admin panel, go to VPN > WireGuard Client.
- Click Set Up WireGuard Manually > Configuration File.
- Upload the
.conffile you downloaded from NordVPN. - Give the configuration a name (e.g., “NordVPN US” or “NordVPN Singapore”).
- Click Apply.
- Toggle the VPN connection to On.
Wait 5-10 seconds. The VPN indicator on the dashboard should turn green. Run a speed test to verify — you should see only a 5-10% speed reduction compared to your baseline (from Step 6).
Pro tip: Download configuration files for 3-5 different server locations before your trip. Save them all on the router. Then you can switch between US, UK, Singapore, or wherever you need to appear without downloading new configs.
Get NordVPN for Your Travel RouterSetting Up Surfshark on Your Travel Router
Surfshark is our budget VPN recommendation — unlimited simultaneous devices at $2.19/month. The setup process is similar to NordVPN:
Download Surfshark WireGuard Configuration
- Log into your Surfshark account at my.surfshark.com.
- Go to VPN > Manual Setup > Router.
- Select WireGuard as the protocol.
- Choose your preferred server location.
- Download the configuration file.
Upload to Your Router
- In the GL.iNet admin panel, go to VPN > WireGuard Client.
- Upload the Surfshark configuration file.
- Name it (e.g., “Surfshark Netherlands”).
- Toggle to On.
Surfshark’s WireGuard performance is slightly behind NordVPN in our testing (10-15% overhead vs 5-8%), but still excellent for everyday use. The unlimited device count is a bonus if you have multiple routers or other devices.
Get Surfshark for Your Travel RouterVerifying Your VPN Is Working
After enabling the VPN, verify it is actually protecting your traffic:
- Connect a device to your router’s WiFi.
- Visit whatismyipaddress.com — your IP should show the VPN server’s location, not your physical location.
- Visit dnsleaktest.com and run the extended test. All DNS servers should be from your VPN provider, not your local ISP or hotel network.
- Run a speed test. Compare to your non-VPN baseline. If overhead is more than 20%, try a different VPN server (closer to your physical location).
If the VPN is working correctly, every device connected to the router is now protected — without any VPN apps installed on individual devices.
Advanced Configuration Tips
Once you have the basics working, these optional configurations make your setup even better:
Enable the Kill Switch
A kill switch blocks all internet traffic if the VPN connection drops. This prevents any unencrypted data from leaking:
- In the admin panel, go to VPN > WireGuard Client.
- Under Global Options, enable Block Non-VPN Traffic (this is the kill switch).
- Click Apply.
Now if the VPN disconnects for any reason, your devices lose internet entirely rather than falling back to an unprotected connection. This is essential if you are handling sensitive work data.
Save Multiple WiFi Networks
The router can remember WiFi networks you have previously connected to:
- Go to Internet > Repeater.
- After connecting to a new network, the router saves it automatically.
- Next time you visit that location, the router reconnects without any configuration.
We have hotel and coworking WiFi networks saved from 15+ countries. Walking into a revisited cafe, the router connects in seconds.
Set Up DNS-Over-HTTPS
For additional privacy, route DNS queries through encrypted channels:
- Go to Network > DNS.
- Enable DNS over HTTPS (or DNS over TLS).
- Set the provider to Cloudflare (1.1.1.1) or your VPN provider’s DNS.
This prevents your DNS queries from being visible to the local network operator, even if the VPN is temporarily disconnected.
Enable IPv6
Some networks and services are moving to IPv6. Enable it on the router for compatibility:
- Go to Network > IPv6.
- Enable IPv6 pass-through or native mode.
This is optional but prevents connection issues on networks that prefer IPv6.
Troubleshooting Common Issues
”Connected to router but no internet”
Cause: The router’s upstream connection (hotel WiFi, phone tethering, or ethernet) is not established.
Fix:
- Log into the admin panel (192.168.8.1).
- Check the Internet section — is the upstream source connected?
- For hotel WiFi: the captive portal may need re-authentication. Open a browser on a device connected to the router and try to load a page. If you see a hotel login page, complete it.
- For phone tethering: make sure USB tethering is enabled on your phone (not just the hotspot — USB tethering is a separate toggle).
”Hotel captive portal does not load”
Cause: The router’s VPN or DNS settings are intercepting the portal page.
Fix:
- Temporarily disable the VPN on the router.
- Connect a device to the router’s WiFi.
- Open a browser and visit captive.apple.com or neverssl.com (unencrypted sites that trigger portal redirects).
- Complete the hotel login.
- Re-enable the VPN.
Some GL.iNet routers have a built-in “captive portal helper” under Network > DNS that detects and redirects captive portals automatically. Enable it if available on your firmware version.
”VPN connected but very slow speeds”
Cause: The VPN server is too far away or overloaded.
Fix:
- Switch to a server closer to your physical location. If you are in Thailand, use a Singapore or Japan server instead of a US server.
- Switch VPN protocols: try WireGuard if you are on OpenVPN.
- Check your baseline speed without VPN. If the underlying connection is only 5 Mbps, the VPN is not the bottleneck.
- Try a different VPN server in the same country — some servers are less loaded than others.
”Phone tethering keeps disconnecting”
Cause: The phone’s power-saving mode is killing the USB tethering connection.
Fix:
- Disable battery optimization / power saving mode on your phone.
- On Android: go to Settings > Battery > Battery Optimization > find “USB Tethering” or “Settings” and set to “Not Optimized.”
- On iPhone: ensure Low Power Mode is off.
- Use the USB cable that came with your phone — cheap cables may not support data transfer reliably.
”Router overheating in hot climates”
Cause: The Beryl AX generates moderate heat during heavy use, and ambient temperatures above 35C compound this.
Fix:
- Place the router on a hard, flat surface (not on bedding or fabric).
- Ensure air can circulate around all sides.
- Point a small USB fan at it in extremely hot environments.
- The router will throttle performance if it overheats but will not be damaged.
Best Travel Routers to Buy
If you are still deciding which router to get, here is our quick comparison:
| Feature | GL.iNet Beryl AX | GL.iNet Slate AX | GL.iNet Flint 2 |
|---|---|---|---|
| Price | ~$90 | ~$65 | ~$120 |
| WiFi Standard | WiFi 6 (AX3000) | WiFi 6 (AX1800) | WiFi 6 (AX6000) |
| VPN Support | WireGuard + OpenVPN | WireGuard + OpenVPN | WireGuard + OpenVPN |
| USB Tethering | Yes | Yes | Yes |
| Max Devices | 12+ | 8+ | 30+ |
| Weight | 185g | 205g | 520g |
| Best For | Most travelers | Budget travelers | Teams, families, power users |
| Visit GL.iNet Beryl AX | Visit GL.iNet Slate AX | Visit GL.iNet Flint 2 |
For our detailed reviews and rankings, see our best travel routers guide and our in-depth GL.iNet Beryl AX review.
Your Complete Travel Router Packing List
Before your next trip, make sure you have:
- Travel router (GL.iNet Beryl AX or your choice) — preconfigured with WiFi name, password, and VPN settings
- USB-C cable for powering the router
- USB charger (any 5V/2A charger — you probably already carry one for your phone)
- Phone-to-router USB cable for tethering (Lightning or USB-C, depending on your phone)
- Travel eSIM installed on your phone — Saily covers 150+ countries with tethering-friendly plans
- VPN configurations saved on the router (3-5 server locations)
- Admin password saved in your password manager (you will need it to change settings)
The entire kit fits in a jacket pocket. The router, cable, and charger together weigh less than 300 grams. It is the highest value-to-weight ratio of any travel tech we carry.
What to Do at Each New Location
Once your router is configured, here is your workflow at every new hotel, Airbnb, or cafe:
- Plug in the router (USB-C to any power source)
- Wait 30 seconds for boot
- Choose your internet source:
- Hotel WiFi: Go to admin panel > Internet > Repeater > select the network
- Phone tethering: Plug in your phone via USB, enable USB tethering
- Ethernet: Plug in the cable
- Connect your devices — they automatically join your saved WiFi network
- Verify VPN — check the dashboard or visit whatismyipaddress.com
That is it. After the initial 15-minute setup, each new location takes under 2 minutes. Your devices never need reconfiguration, and your VPN protects everything automatically.
The Bottom Line
A travel router is a $90 investment that transforms your travel internet experience. Secure WiFi everywhere, consistent network credentials, VPN on all devices, and the ability to share one phone’s eSIM data with everything you carry. The initial setup takes 15 minutes. After that, you plug it in, pick an internet source, and every device just works.
If you are a digital nomad, remote worker, or frequent traveler, this is the single best piece of travel tech you will buy this year. Start with the GL.iNet Beryl AX, configure NordVPN or Surfshark on it, install a Saily eSIM on your phone, and you have enterprise-grade connectivity in your jacket pocket.
For VPN setup details specific to NordVPN and Surfshark routers, see our dedicated VPN on travel router guide. For choosing between different routers, check our full best travel routers ranking.
Frequently Asked Questions
Do I need technical knowledge to set up a travel router?
No. Modern travel routers like the GL.iNet Beryl AX have a web-based setup interface that walks you through each step. If you can connect to WiFi and open a web browser, you can set up a travel router. The initial setup takes 10-15 minutes, and once configured, the router remembers your settings. You just power it on at each new location and it works.
Can I use a travel router with an eSIM on my phone?
Yes. Connect your phone to the travel router via USB cable (USB tethering). The router creates a WiFi network from your phone's eSIM data, and all your devices connect to the router. Your phone charges through the USB connection simultaneously. This is the most popular setup for digital nomads — it gives you the flexibility of a travel eSIM with the performance of a dedicated router.
How do I set up a VPN on my travel router?
Most GL.iNet routers have a built-in VPN client. In the admin panel, go to VPN > OpenVPN Client or WireGuard Client. Download your VPN provider's configuration file (NordVPN and Surfshark both offer these), upload it to the router, and enable the connection. WireGuard is recommended over OpenVPN for faster speeds. Once configured, every device connected to the router is automatically protected.
Will a travel router work with hotel WiFi?
Yes. This is one of the main use cases. The router connects to the hotel WiFi as a client (just like your phone or laptop would), then creates its own private WiFi network. You connect your devices to the router's network, which adds VPN encryption and eliminates the need to log each device into the hotel portal separately. Some hotel captive portals require a browser login — you do this once on the router.
What is the difference between WireGuard and OpenVPN on a travel router?
WireGuard is faster and uses less battery — it typically adds only 5-10% speed overhead compared to 15-30% for OpenVPN. WireGuard connections also establish faster (under 1 second vs 5-10 seconds for OpenVPN). OpenVPN is more widely supported and can be harder to block by firewalls. For most travelers, WireGuard is the better choice. Use OpenVPN only if WireGuard is blocked in your location (rare, but possible in China or Iran).
How much does a travel router cost?
Good travel routers start at $60-70 for the GL.iNet Slate AX and $80-90 for the GL.iNet Beryl AX (our top recommendation). These are one-time purchases — there are no subscriptions or monthly fees for the router itself. You still need an internet source (hotel WiFi, phone tethering, or a SIM card), and a VPN subscription costs $3-5/month separately.
Can I use a travel router to extend weak WiFi?
Yes. Travel routers operate as WiFi repeaters. They connect to a weak WiFi signal and rebroadcast it as a stronger, private network. This is especially useful in large hotel rooms, Airbnbs with the router in another room, or outdoor cafes with spotty coverage. The router's WiFi radio is more powerful than your phone's, so it can maintain a connection at distances where your phone drops it.
Do I need a travel router if I already have a VPN app?
A VPN app on each device works, but a router-level VPN is better for three reasons: (1) All devices are protected automatically — you do not need to remember to enable VPN on each device. (2) Some devices do not support VPN apps (e-readers, smart watches, IoT devices) — the router protects them anyway. (3) You configure the VPN once and it works everywhere. The trade-off is carrying an extra device, but most travel routers are pocket-sized.